
I'm writing this on the 23rd of July 2025. 40 years ago, The Amiga Personal Computer was revealed to the world at the Lincoln Centre in New York. Andy Warhol was invited to paint the famous Debbie Harry, live on stage with the Amiga 1000. You can watch the event on YouTube.
Things have moved on quite a since then. The Amiga was quite probably, the first multimedia computer. It was pretty big here in Europe, especially in the UK and Germany in the 80s and 90s. Today, it lives on through enthusiasts who still make games, software and hardware for this legendary machine.
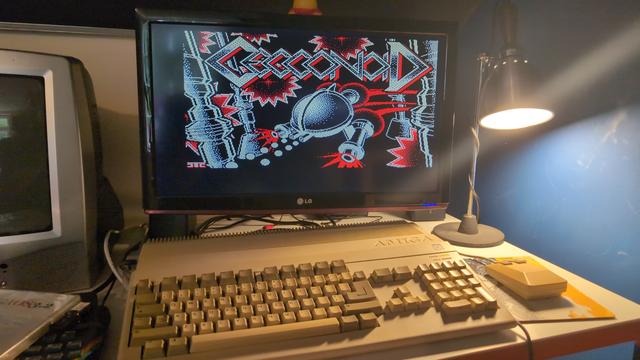
I upgraded the hardware on my Amiga 500 sometime ago. It's no longer the machine from the 80s - it's better! The rougher edges are smoothed away; the machine has a new relevance. The hardware was the first part - now it's time to talk about the software.
Much of what I've written here will also apply to WinUAE or Amiberry, if you fancy doing things with an emulator, much of what follows will work too. I've setup a similar machine with Amiberry.
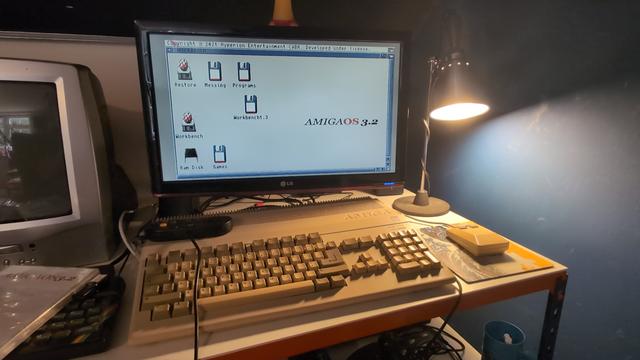
I have an Amiga 500, the same kind I had in the 90s. I've added a Vampire A500 V2 as the main accelerator, an additional Ram upgrade with clock, an ENC28J60 ethernet adaptor board and a Gotek USB Floppy. These upgrades form the basis of my Amiga setup. What do these additions allow us to do?
First off, the Gotek lets us use a USB stick instead of floppy disks. This is the approach I'll use to get the software onto the machine. The ENC28J60 adapter should give us some network access. The extra memory and realtime clock will make the final experience a bit nicer. But the real difference is the Vampire card.
There are a number of accelerators one can purchase for the Amiga - the PiStorm and TerribleFire are two other examples. What they have often have in common is some sort of faster processor, compatible with the Motorola 68000 CPU and often some sort of harddisk emulation. The Vampire card does these things, but also includes a socket for the ethernet controller and an HDMI out for retargetable graphics. The hope is to get all these working.
The next stage is to start looking at the software.
The easiest solution is to use a ready-made setup. There are two that I know of: CaffeineOS and CoffinOS. Both have optimisations for accelerator cards. I tried CoffinOS. All one needs to do is download the ISO, write it to a compact flash card, pop it into the vampire and away you go.
CoffinOS seems quite complete. It has a whole bunch of software installed, the HDMI and networking both seem to work. At this point we could call it done. CoffinOS did amaze me - it set the bar for me on what was possible with a modern Amiga. However it felt a bit like cheating. I'm keen to setup my Amiga myself, so I figured I'd start from the beginning.
Before we get started, it's probably a good idea to list the various tools we need to use. I'm pretty much a Linux man these days, but there will no doubt be equivalents for MacOS and Windows.
Creating an ADF with xdftools is quite straight-forward:
xdftool new.adf create
xdftool new.adf write readme.txt
This assumes readme.txt exists.
Before we install an OS, we'll need to figure out the ROM we have. My Amiga A500 back in the day came with Kickstart 1.3 - the one with the classic hand and disk image on power-up. The Vampire comes with a much later, custom rom - 3.10. This should cover us for any OS we might want to use. It is possible to pick up Kickstart ROM chips from places like Amiga Forever and AmigaStore, instead of using an accelerator. With a recent ROM, we can look at getting a version of Workbench installed.
Trouble is, I found this quite confusing. There are a number of different versions of Workbench. Not only that, but a larger number does not mean more recent. As far as I can tell, the version numbers work as follows:
Confusing? A little. Not only is this a bit awkward but these version numbers aren't the only numbers. 3.2 is reported as 47.X where X is the revision.
Amiga OS 3.2 is under active development. I bought mine from Retro Passion. It comes on a CD-ROM. Fortunately, I still have the means to read such thing (I think a digital ISO is also available). The CD-ROM contains the ADF files - effectively Amiga Floppy Disk images - which we can load onto the USB and into the Gotek.
I'm using a 32GiB compact flash card as my main storage. The first goal is to setup the partitions and format them.

The OS includes an installer ADF. We boot up with that virtual floppy disk in the Gotek Drive. We are greeted with an older version of Workbench, complete with an installer tool and a disk partitioning tool - it feels quite modern. I decided to split up my drive as follows:
I don't know if there is a better way to do this but I figured this would do. The tool to use is called HDToolBox and is in the utilities folder of the OS3.2 installer.
Folks from the Scottish Amiga Users Group suggested that I use Professional File System version 3. This involves downloading this file from Aminet, putting it inside an ADF, loading it onto the Gotek and transferring it to the Amiga.The file itself should be copied somewhere like the RAM Disk, or perhaps into the Workbench installer itself. I simply dragged and dropped the file into the RAM disk.
Next up, the partition manager. Now there are a number of gotchas here. Ones that cost me quite a lot of time. The partition manager itself looks like many other partitioning tools, and functions in mostly the same way. The first thing to do is change the drive type in the Disk Partition Tool in the Workbench installer. Click on the define new box, then in the next window, click the read configuration button. Most of it will all be filled in correctly. You might need to add a few names, like manufacturer and Drive name but neither of these seem too important.
The next stage is to setup the partitions themselves. This bit is tricky and I got it wrong many times. The steps to victory go like this:
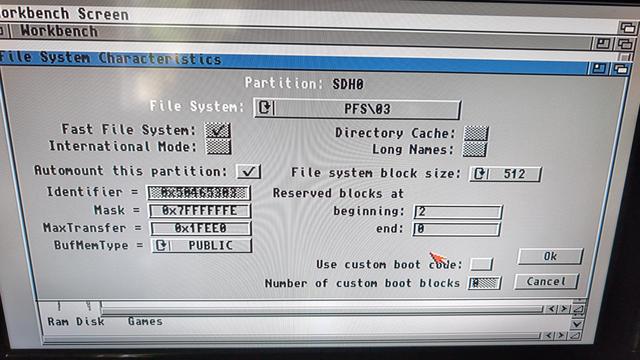
This should take you into a new screen. There are a number of options here that need setting carefully:
There is another excellent guide at Lyonsden blog that goes into paritioning a CF card and installing OS3.2.
With the partions set, we can install our OS and Workbench.
The installer program for Workbench will copy all the various files required to run workbench to a partition of your choice - in my case DH0. One of the most important things I found is to use intermediate mode. Early in the installation, you'll be asked if you want to install using the novice, intermediate or expert modes. Intermediate or expert is the way to go. The reason being is that the installer recognises my machine as an A600, and as such the installation will fail.
Once Workbench is installed, the machine will reboot and - fingers crossed- you'll end up with a working workbench. One of the most important programs is the Amiga Shell. It can be found under the System drawer within the Workbench drive.
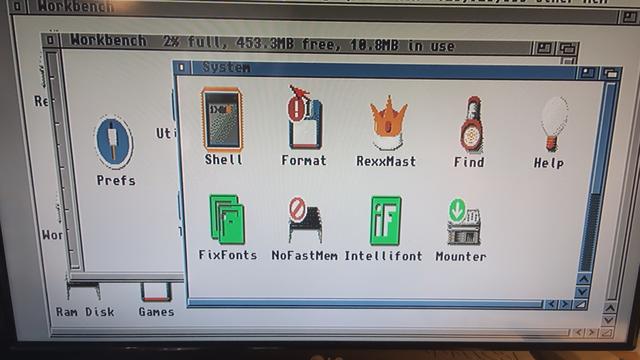
If you are familiar with bash or other Linux terminals, this will seem familiar. There is tab completion, ctrl-c kills processes, all that sort of thing. To change to a directory, you use the command cd. To list the contents, type dir. A full list of commands can be found at the Amigaos.net wiki.
Amiga OS has the concept of devices or drives - essentially, these are top level directories or folders that represent a partition, or a RAM Disk or some sort of storage, or a shortcut to some other storage - a bit like a symlink that acts like a top level drive. I believe the correct term is logical device. To access these one would type:
cd Workbench:
The colon at the end is the important bit. There is an excellent guide at amigaos.net. There are a number of useful locations such as:
To edit a file, one can use the program ed. Simply type:
ed <filename>
and a shell based editor will pop up. To save a file and exit, press ESC, followed by 'x' then return. There is an excellent guide here
We'll need to use the shell to decompress lots of files.
One of the most important tools - or rather, file formats - is lha. This seems to be the most common compressed file format in use on the Amiga. I believe this is largely due to Aminet using it considerably. LHA is also the name of the program used to decompress such files; it can be downloaded from aminet. I placed this inside an ADF file and copied the file over to the RAM disk. This file is self extracting but it needs to be run from the Amiga Shell. Navigate to this file and execute it. The resulting files are different versions of lha for each processor type. I kept the one for the 68000 by copying it to my C: directory.
Many of the install steps will involve downloading an lha file from Aminet. This file will no doubt be placed inside an ADF, put on a USB stick, copied to the RAM: disk, then decompressed with lha. This is pretty much the main workflow I used for installing things.
So this bit is Vampire specific and doesn't apply to other setups. The SAGA drivers can be downloaded from Aminet. This file has has the drivers for the ethernet adaptor and the retargetable graphics. As the Aminet instructions suggest, it's best to install the Picasso96 package first. We'll talk about Picasso96 in the next post, but for now, it's a good idea to install the package first.
One of the most useful advances in the history of computing has to be TCP/IP, or rather, the idea of connecting computers together in networks. We take it for granted now but it wasn't common in the home back when the Amiga was king. You really miss it when you don't have it.
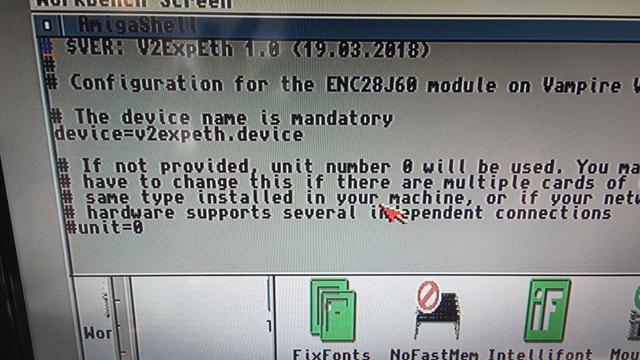
With the Vampire, we need to use the V2ExpEth driver, installed with the SAGA drivers. On Amiberry, there is the uaenet device that does a similar thing. But we need a TCP/IP stack, which in my case is provided by the program Roadshow. I paid the fee to get the unlimited copy. There are two versions - the full and the light. The light one is the one I went with because it's the only one that fits inside an ADF. Installing it requires the usual copy-to-adf, LHA extract and run.
Using Amiga shell, we need to copy a device file:
Copy SYS:Storage/NetInterfaces/V2ExpEth#? Devs:NetInterfaces
We can then open this file with Ed:
ed Devs:NetInterfaces:V2ExpEth
There are various settings around dhcp, gateway, etc. All the usual things you might want to tweak with a network connection. Once this is setup to one's satisfaction, we can begin to test things. In the shell type:
addinterface V2ExpEth
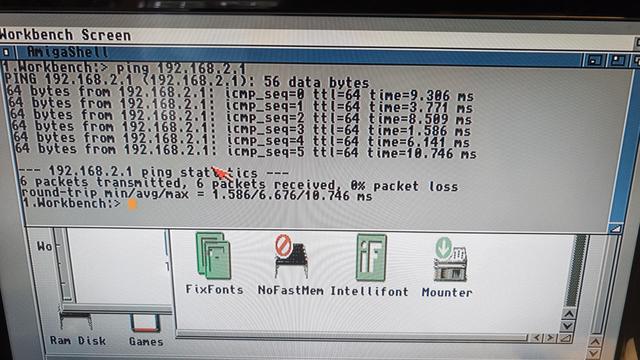
Hopefully, an IP address is set and things are good. We can make sure by trying to ping something:
ping 192.168.1.1
... or some other IP on your network.
Samba is an implementation of the SMB networking protocol, which is used by Microsoft in various ways. I have a file server that runs, among many things, samba. I think it's useful to copy files directly to the Amiga and not have to use the adf-usb-copy loop for any longer than we need to. It's slow and - to my mind - annoying.
We need two more programs from aminet - smb2fs and filesysbox.
Both of these are installers - we use the adf-usb-copy-lha loop again. The next stage is to create a mountlist. For all intents and purposes, it's just a text file in a specific place (like so many things).
An example of a mount list could be this:
Handler   = L:smb2-handler
StackSize = 16384
Priority  = 5
GlobVec   = -1
Activate  = 1
Startup   = "smb://myuser:password123@mypc/myshare"
Again, we can use ed to create this file. The name of the file will be the name of the mount (I believe), saved in DEVS:DosDrivers, so something like:
ed DEVS:DosDrivers:myshare
There is a good guide here. The github repos has the guide to the Startup line in that file.
If we go to our Amiga shell and type the following:
cd myshare:
... the amiga should mount the share, and you'll find yourself browsing your remote files.
So if everything has gone well, we now have an Amiga with the latest OS, permanent storage, a network connection and some useful tools. At this point we can begin to use the Amiga like we'd use any other machine - to some extent; copying things over the network.
Let's quickly review where we've got to:
I need to thank the folks at the Scottish Amiga Users Group. I couldn't have put all this together without their help.
So that's quite a bit there, but there's more to do before we get to something resembling the CoffinOS setup, or the kinds of desktops you see posted on Reddit or what not. The main things left to do, as far as I know are:
Should be fun! I'll be sure to keep you all posted!
