
One of the things I'm keen on is getting a little closer to the land and gardening is one way of doing that. We grow many vegetables and fruits at our place which can be very rewarding; there's a circle of life thing going on as we take the compost from our wormeries and use it to provide nutrients for the next year's plants. However, compost needs to be sieved and mixed with soil before it can be used. This process takes a while and can be very boring! I figured it could be automated and so, I set about making a trommel.
A trommel (or perhaps a trommel screen) is a rotating screening machine. They are used in many different scenarios - wherever things need to be broken up and separated. I read an article recently that large trommels are used to make charcoal and to sieve wool. I figured this was perfect to sort out my compost issues. But where to start?
The thing most similar to a trommel is a washing machine or tumble dryer; I figured that was the place to start. I made my way to Tayside resusers - a wonderful place in Dundee. These folks take unwanted items from recycling centres, donations and such and repair them for sale. It seems like a really good venture to me. I managed to get hold of one for a cheap price.
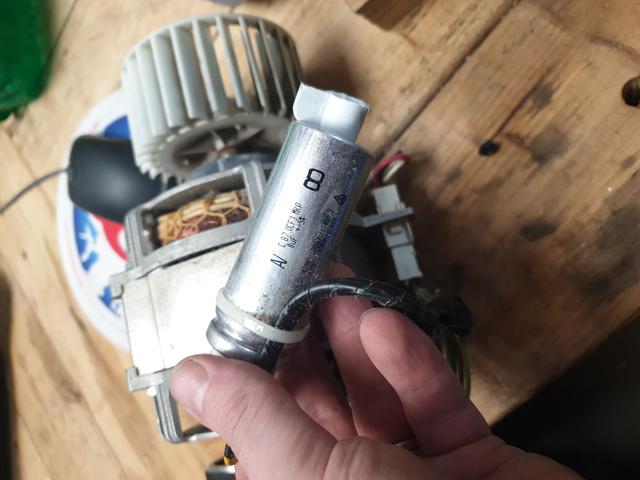
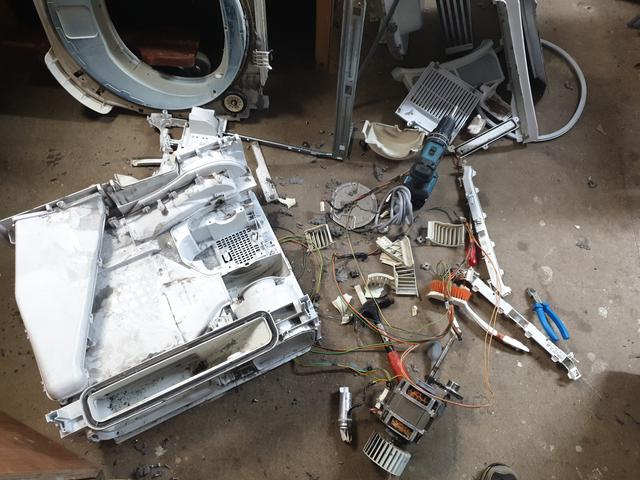
Taking apart the dryer was a bit more of a challenge than I thought. Most of the components come apart with screws or clips but a small few, such as the fan on the motor axle, refused to budge. In the end I had to break a few bits in order to remove the motor from the housing. Sadly, many of the parts I couldn't reuse, though the heating element seemed like it might be handy, as did the water container.
The frame itself is built from leftover wood we've either collected or found at the house when we bought it. One of the goals of this project was not to buy any new parts or tools (or at least keep it to a minimum). Fortunately, I had all the screws and drills I needed to assemble a rather robust frame. Mounting the drum inside the frame was fairly straight forward as the metal backing plate could be screwed onto the wood. The drogue wheels that support the front of the drum were remounted in the same position at the front; simply hammering in their axles seemed to work.
The motor itself is an AC 240V motor with I suspect two speed settings. I managed to find what I thought were live, neutral and ground but when I wired them up, I actually tripped all the breakers in the house, even though I was in the workshop! Ouch! Nevermind! I got it right the second time fortunately. I decided not to bother with a switch - I'll wire one in next time. Wrapping the electrics in plastic sleeving, I set to work on mounting the motor.
I figured the best thing to do was to reuse the original plastic clamps. I had some ideas about 3D printing new clamps that I could screw to the frame in a clever way but in the end, making a 'U' shaped frame from three bits of wood, then holding the motor down was more than sufficient. I had to mount it at the top of the frame so it wouldn't get covered in soil or rocks. This is a bit of a problem as the tension is now held by just the motor, and possibly the entire weight of the drum. With the motor at the bottom, the drogue wheels and frame would have taken the weight and the tension would be much harder to get wrong. Still, I felt I didn't have much of a choice so I pressed on.
The first test went okay I guess. The machine spun and soil came out. Sadly, not a lot of soil came out and what did came out of the sides. Not ideal.
The first thing to do was to redrill the holes. I'd started with holes around 8mm in size, but decided to increase that somewhat. Secondly, I realised I needed to add some sides and maybe a flap at the front. I had some plastic board - the kind that is made of rectangular tubes of plastic attached together - I don't know the name. It's possible to cut this with a stanley knife and attach it with nails. It's flexible enough to bend out of the way.
For the front flaps I took some old roofing felt, cut it into strips and nailed it to the front frame at the top. The second test went much better than the first, with the soil now going where it should. However, there was one thing I realised I still needed to do.
I needed to add some legs. Placing the trommel on top of some bricks really didn't cut it. I needed to get a big bag under there easily, maybe a wheel barrow and so I figured legs made ergonomic sense. This was fairly straight forward as we had a couple of old posts lying around. These made excellent legs that turned out sturdier than I thought they would.
to the legs I added a couple of cross braces and some cup hooks to hold the bag in place - this would collect the compost.
With the legs and screens in place, the trommel was almost at it's final form. I've since moved the cup hooks to the top of the legs and added a support strut from the front of the frame, to the back underneath the motor. This stops the motor from angling downwards under tension from the belt. This has vastly improved the performance of the device; I found the belt would constantly slip off the pulley as the motor moved. A small shim to keep the motor from turning in it's clamps and we are all set. I've had a couple of batches of compost made using this machine already and I'm quite happy with the results. It'll certainly make next spring a lot easier, allowing us to get more of the beds setup for more veggies.
Yeah, so there's no programming, computers or any hackery of that sort going on here. However, there is technology for sure, and not only that, useful and empowering technology with a good dash of upcycling thrown in. I've been thinking a lot about the solarpunk movement (after the death and zombification of cyberpunk) and although I'm not sure anyone quite knows what solar-punk really is, I think I may have taken a few steps towards it (despite, ostensibly, solarpunk being an anti-technology sort of affair). I'd like to do more of this sort of thing, though where computers fit I'm not so sure. Many projects I've seen along these lines aren't really quite 'punk' in a sense. Nevertheless, it's a thing you can expect from me going forward.
