
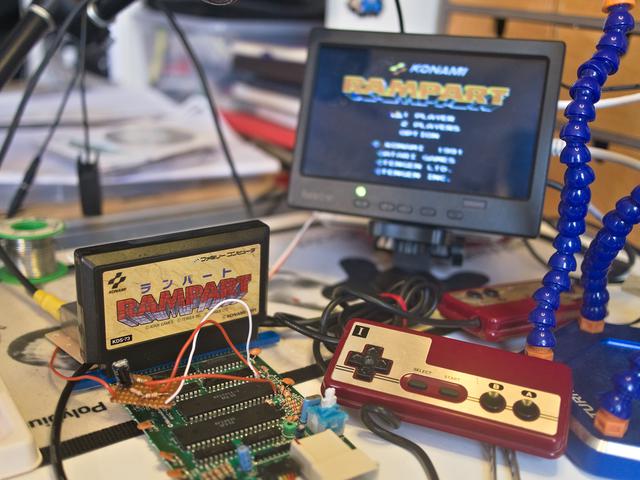
The Nintendo Famicom - one of the earliest consoles, released in 1983. To most of us in the West, we know it as the NES (Nintendo Entertainment System). I was lucky to pick this up in Ojamakan for around £9 and at the same time, snaffle a couple of games too: Labyrinth, Rampart and a game I'd not heard of before - Golf. When I picked this last catridge out of the box I immediately had an idea. I was moving to St Andrews, known as the home of golf. Maybe there was a way for a notorious hater of golf to meet the 'Old Course' half-way?
So then! Lets get modding this piece of history up to the modern day!
The first thing to note is the 9V power supply, or lack of one. Now, the barrel jack hasn't really changed that much over the years but what has changed is the polarity. Generally, the centre pin of the jack is positive and the outer ring is negative. Not so on the Famicom it seems.
The first thing to do then is to find a power supply and cross over the wires, using some solder, a little heat shrink and my trusty soldering iron. With that done I made very sure I stuck a label to this power-supply, so I know never to stick it into something else.
Like most consoles of this era, the Famicom was designed to be plugged into a TV - a Japanese one in this case! Not much use unless you have an old tuner and even then, it'll need to be NTSC and cover the right channels. Apparently, we need channels 92 and 96 or something, which is 92Mhz I believe? Still, my capture card didn't seem to pick it up.
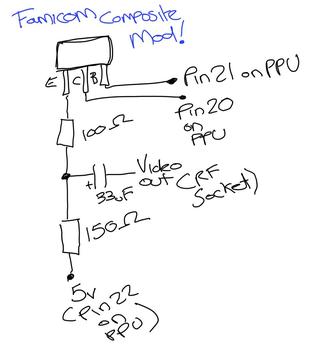
It's possible to get a composite video signal out of the Famicom though, but it requires some considerable modifications. There are a few different mods out there, including one by that famous ctrl-alt-rees chap. His approach is a bit odd. On the one hand, the design of the circuit is quite sophisticated and he takes good care to get rid of the prison-bars effect, placing components away from noisier elements. On the flip-side however, the components are soldered together using their legs, draped across the board in a way that seemed rather haphazard to me. I don't particularly like through-hole and wire soldering at the best of times, so if I have to do it, I prefer to use a PCB or some strip/vero board.
With that in mind I went for the simpler modification over at sofaracing. It's not the only mod you can choose from though. I found another at 8bitplus but the one I've chosen seems to work well enough for my purposes.
Step-by-step, the modification goes like this:
You need a few parts for this mod, including:
You'll need some tools too:
I used my soldering iron, a solder sucker and some tweezers to get the ECB transistor off the board. It took quite some doing. Maybe a heat gun would have been a better option? Anyway, I managed to get it off with no damage. From then onwards it's a fairly straight forward job to build the circuit. It's a little more tricky to get the whole thing inside the case.
This is a little different. To get sound out of the Famicom, we need some wire, a socket and a single 220uF capacitor. We attach the positive end of the capacitor to Pin 46 of the cartridge connector (the big blue ZIF socket where the cartridge sits). The negative side of the capacitor is your sound output.
The problem is that we need some sort of a socket to attach whatever speakers we want to use. I decided to use a stereo jack I had lying around, passing the mono signal to both stereo channels. I wrapped the socket in heat-shrink and led the wire and the socket out of the back of the Famicom. Although I've already altered the PCB by cutting a trace, I didn't want to modify the outer casing, partially through fear of breaking the case, but mostly because I want it to look as original as possible.
With the sound and video all working, the final step was to make all this portable. This wasn't too troublesome as I have a small monitor that will take a composite input. It's designed for use in cars and so will run off a 12V supply. I have a couple of li-poly batteries that kick out 12V, so I stuck one into the monitor, and the other into the Famicom, making sure I had the polarity the correct way around! The Famicom seemed fine running at 12V though I wouldn't recommend it!
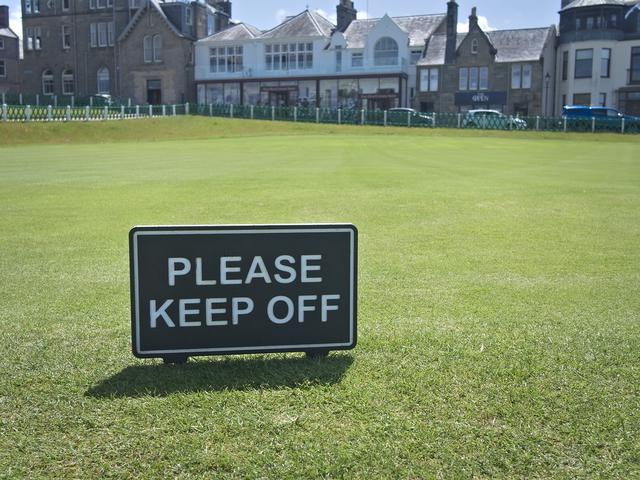
I am of the opinion that Golf is "the best way to spoil a good walk". In all fairness I can sort of see the appeal, but for various reasons, I must snark at it, at least somewhat. St Andrews is known throughout the world as the home of golf and it's fair to say that it's a pretty big deal here. As I live close-by I thought that it would be good to meet to the golfers half way and play some golf on the world famous Old Course in St Andrews.
Despite all the signs saying 'keep-off', it is possible to walk along most of the course on a Sunday. For reasons that are probably to do with Scotland being quite religious in it's past, golf isn't played on the course most Sundays, unless there happens to be a big tournament on, as there was when I tried to visit the first time for this project!
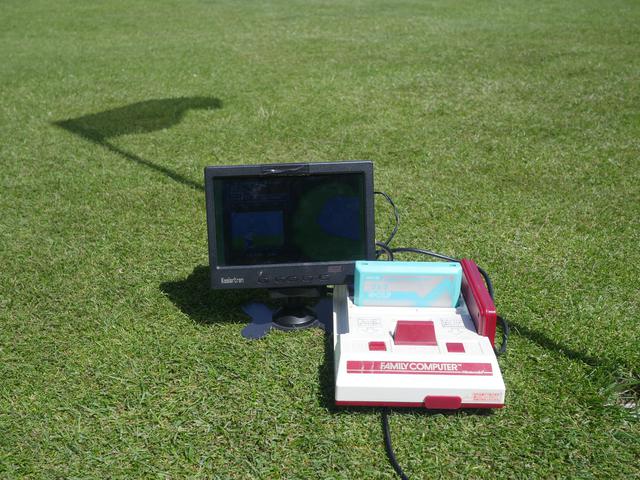
One of the most famous landmarks is The Swilcan Bridge which crosses the Swilcan Burn that runs through the course to the sea. We decided to try playing golf on the bridge but the sunlight was causing problems. Instead, I sat the Famicom down on the grass next to the bridge and played on the green. The light was slightly better - always tricking using screens outside in the sun.
I have now, most definitely, played golf on the Old Course, in my own way! It's a nice little memory I've forever attached to this machine. From a retro computing shop in Kyoto, Japan, all the way to a tiny town in Fife, Scotland. Not bad eh?
