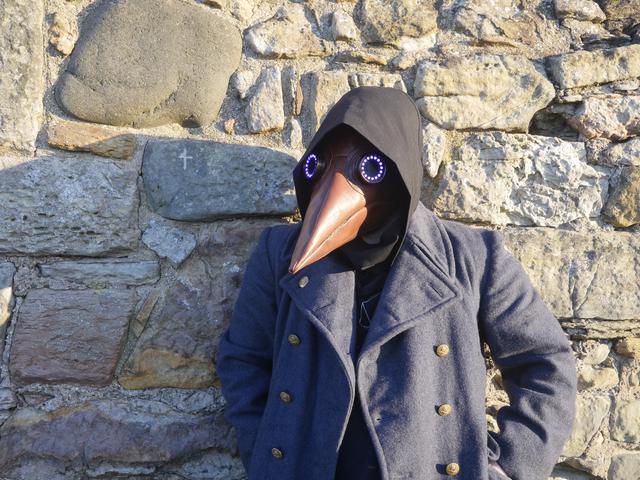

Masks have become somewhat more normalised these days. I won't go on about the, well, utterly terrible pandemic that's still raging on at the moment, except to say quite a few things have changed - some in deep and subtle ways. I used to check I had my wallet, keys, phone and handkerchief in my pocket before I went out. Now, I need to check to see if there's a mask in there too.
I thought it might be fun to try and turn this mask thing around and make something of it - try and be somewhat positive. I figured I'd make my own mask in a cheeky and technological way. Given the current times and the current love of all things steampunk, a plague doctor mask seemed like just the thing! To make it a little more modern - and a bit more fun - I thought some neopixel rings and animated eyes would help.

There are many designs of for plague doctor masks out there. I went with a design very similar to the one here. It's fairly simple, with few parts. Once printed on A4 paper, I taped it together, taking care to get the pieces in the right place. With that done, I could cut out the pieces one by one, occasionally using our glass coffee table with a lamp underneath so I could see what I was doing.
I'd settled on leather for the mask, as I had some reclaimed leather left over from an old chair I saved from a skip. Rather than pin down the pattern onto the leather, I used a combination of pritt stick (a light paper glue) and some tiny bulldog clips to hold the pieces in place.
Cutting out the leather is a tricky job. We have an incredibly sharp 'pizza-cutter-like' wheel for this sort of thing. I've nicknamed it 'The Thirster' as it's drawn my blood a couple of times! Of course, it has to be sharp if it stands any chance of cutting the leather. Between it and a sharp pair of material scissors, I managed to get the pieces cut out. Since the glue isn't too sticky, removing the paper pattern pieces wasn't too hard.
For the eyepieces, I ordered a pair of steampunk plastic goggles from eBay. They were cheap and nasty on their own, but with a little trimming and some adjustment, they would fit the eye holes perfectly.
We have a few sewing machines in our household, but the one we use the most is an old, foot treadle singer. You'd think this wouldn't manage leather but with the correct needle, even this machine will sew leather. most needles aren't super sharp as they are designed to push between the threads of a woven material. Not so with leather - you need to make your own holes. A leather needle is very sharp with a wide point, made for punching through the material. Even with this needle however, I had to hand crank the machine and go pretty slow.
Most of the parts went together fine, however the smaller eye pieces were a bit of a problem. We attached them with glue first, which seemed fine, but as we began to top-stitch them, our needle got stuck and caused a couple of severe snarl-ups. Not ideal at all! Still, we managed to unpick the knots that had formed and carried on.
The straps were sewn on, rather than riveted as I don't have a riveter yet. It's a shame really as I quite like the more steampunk look. I can always add them later, along with some fancy decorative stitching. We added a sliding buckle to adjust the strap length.
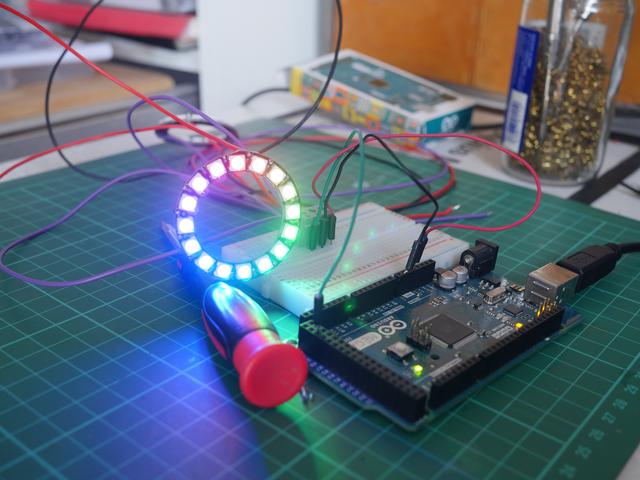
I quite enjoying mixing hi-tech with other forms of craft and art. For this build I had a few ideas - a heads-up display, some sort of voice box affair? In the end I settled for animated eyes as I had most of the parts and could get it done within a reasonable time.
In a nutshell, the electronics revolves around two neopixel rings, an arduino nano, an HC-05 bluetooth module and a battery. The plan was to be able to control the eyes from my mobile phone. I had a quick look around and found that the HC-05 module was pretty popular and could be wired into the arduino fairly easily. Plenty of code is available online so that would cut down development time. Despite this module not being Bluetooth-Low-Energy, I bought a couple and set to testing.
Various schematics on the internet variously show the HC-05 connected via level shifters, voltage dividers or just straight into the digital ports on the arduino. I went with the latter and it seemed to work fine. I suspect some models have level shifters built into them. The arduino uses 5V TTL whereas most devices these days use 3.3V or even less. However, the model of HC-05 I bought seems to work just fine with things wired straight in, so I went with that.
I tend to breadboard things before soldering them up. I generally don't like doing through-hole soldering these days as it involves a lot of wire which I have real trouble with. I'm glad I did a fair bit of testing as the bluetooth connection seemed not to work at first. The HC-05 creates a serial port with the host device, so you can send simple commands. At first I wasn't seeing anything on the computer end but eventually, I realised I needed to echo the commands back from the arduino. This didn't quite solve the problem - the arduino would crash after just a single command.
I tracked down the problem to the Adafruit neopixel library. For some reason, it wasn't happy driving two neopixel rings at once. I thought maybe there wasn't enough power (always a good thing to check), so I wired the board into my bench power supply. That didn't solve the problem either. In the end, I moved over to the FastLED library, which I've used before. I'm not sure why I didn't start with that library to begin with, as it's incredibly good - more features and more optimisation than any other LED arduino library I know. This fixed the problem right away.
The arduino platform makes development of these sorts of things pretty quick. Once I'd worked out the FastLED library stuff, the rest was pretty easy. There's a gist on github that you can take a look at.
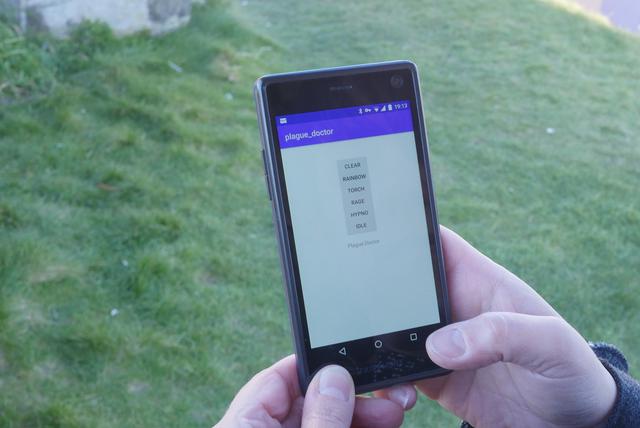
The other side of the software is the Android Bluetooth App. I'd been dreading this bit as I've not had a lot of luck with writing Android applications. The last one I wrote was a difficult project, largely because of legacy code, older devices and the myriad of hoops one has to go through. Still, this year I wrote a small bluetooth application that worked fine,so I set to.
Android studio and Kotlin seem like the way to go. I found a bluetooth library on github with some nice examples. A few buttons and callbacks later and I had a working app. All within a few hours. I was amazed! Perhaps it's because this application is incredibly simple or, more likely, the programmer of the bluetooth library did a really good job. Either-way, the application works a treat. Had I tried to do this for an iPhone, I'd have had a lot more trouble, if indeed it were possible at all without a developer account (or a jailbreak!).
The mask itself is quite hard to see out of, but not impossible. It's not too heavy and it's reasonably comfy to wear, though the eye parts aren't the best. You can definitely go around town with ease wearing it. I'm mostly amazed the bluetooth holds up to be honest - I've never been the biggest fan of that particular communications protocol. Nevertheless, that proved to be the easiest bit.
It's still not quite finished. It needs a few more rivets, a way of keeping the slack of the strap neat and some better fixings for the electronics on the inside. Ideally, it would have a filter in it too for extra safety. All the additions are still possible and when I get more time, I'll be sure to add them.
It's been a rotten time for many folks during this pandemic and no mistake. I figure this is a small step in the right direction - to make the wearing of masks a little more joyful.
