
I've used the original EMF Tilda badge before in a doorbell project. It's a really useful badge as it's essentially an Arduino with extra features. I've built a basic hydroponics setup sometime back but I've wanted to revisit it for sometime as I wanted to make quite a few improvements. For this first step, I wanted to use a computer controlled pump, connected to a battery and solar panel. I'd use small baskets, filled with the porous clay balls that form the medium, to hold the plants. These would sit in a series of pipes, with water pumped to the top, draining into the sump below, where the process starts again. The idea being that solar power alone would keep this system running.
The first major change is how the water is delivered. In the old setup, we used a solar pump for fountains and allowed the top half of the bed to flood and then slowly drip down. This seemed fine but there are a few problems with that. Controlling the rate is one thing. Often, the bed would flood too much and you'd loose the plants and clay balls. Secondly, having the tanks be transparent is a bad idea as algae the like can grow in it. Not only that but the roots of plants don't take too well to direct sunlight.
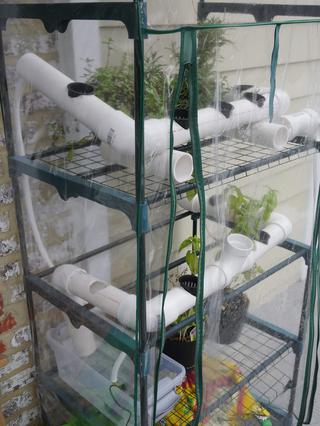
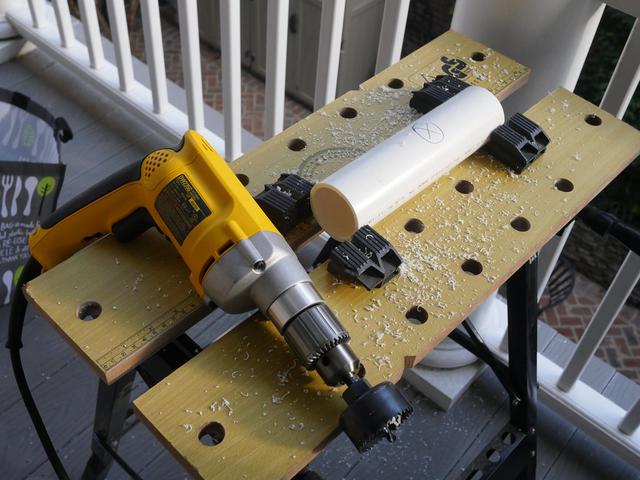
I figured the best thing was to buy some PVC pipe and create a track for the water to flow down. Spaced along this track would be holes for the baskets of clay balls and plants to sit. So I bought some pipe from the local hardware store, a drill and the correct hole boring bit and set to work. All of the attachments are push-fit so it's easy to assemble.
The greenhouse is one of these small, plastic affairs you can buy cheap from eBay or your local garden centre. It's great for when you have little space. The pipe work fits inside reasonably well, with space left over for normal plants.
The pump was a tricky choice. I don't know anything about pumps, hydraulics and all that but I figured I'd learn. The flow rate for hydroponics is quite important. You want a certain amount of water to rush over your plants at a certain speed. If I knew more I could probably work it out, but I figured I'd start with 12V pond and fish tank style pumps. Looking at how high they can raise water seemed the obvious factor. I chose a cheap pump from eBay hoping it would work. Perhaps the harder thing was to get the fitting correct. Finding a pump with a compatible screw thread proved to be a little tricky.
Eventually though, the line I'd bought almost fit the pump. It's not a perfect fit but it's good enough for now. Immersing the pump and linking it to the battery, I found that it actually worked! Hurray! With that hurdle overcome, it was time to take a look at the controller.
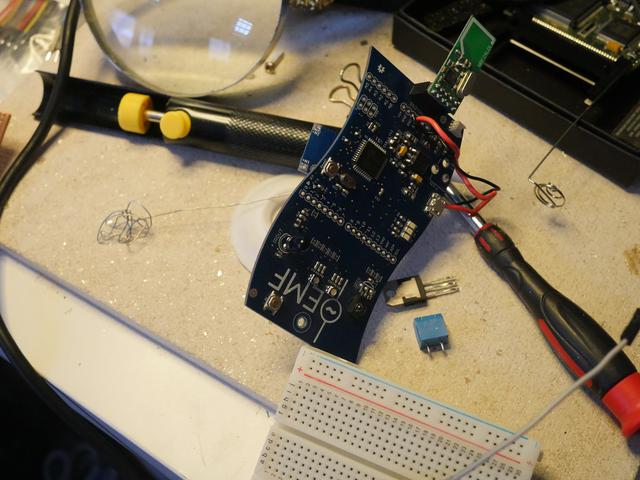
The EMF Tilda badge has gone through a few revisions, with the most recent being quite a serious project! I've stuck with the original for now because ultimately, I want something simple that I can expand on or adapt later. Ultimately, I'll build a custom hydroponics board with all the breakouts I need. For now though, this is more than adequate.
The circuit is fairly simple. Using a MOSFET to turn the pump on and off was quite easy. More tricky was getting the badge to run off 12V. There was some thought that the badge could do this with just a few changes to a couple of connections. I tried this but couldn't get it to work, which was a shame. In the end, I bought a 12V to 5V converter from eBay. These units are cheap enough and seem to work quite well.
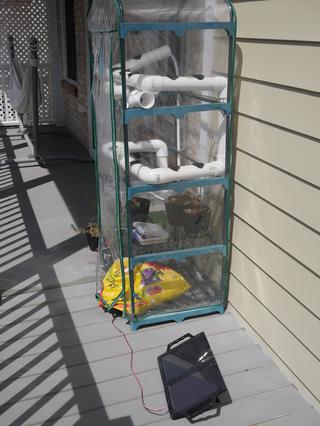
I'm still wondering how best to integrate the solar panel. Ideally, one needs to measure the voltage across both the panel and battery and decide what to do accordingly. In the end, I couldn't come up with a circuit that measures both reliably. In the end, I took the panel out of the equation and used a light sensor instead. I figured one could tell what time of day it was given the voltage across the panel but it didn't really seem to work very well. In the end, I just plugged the panel directly into the battery and left it at that!
The badge is programmed to turn on the pump when the light reaching it exceeds a certain threshold. Initially, I'd set this threshold too low. It turns out the sun is much more powerful than my desk lamp I was testing with! With this glitch fixed, I packaged the badge up in a Tupperware box which seemed to provide ample protection. Linking everything up, it seems to perform quite well. Proper calibration of the light sensor is needed, as the pump generally comes on only when it's really hot.
So far, the system has been running constantly and with no problems. However, I'm still waiting to see whether or not it is well balanced between solar charging and draining the battery. Hopefully, this system can run more or less perpetually, at least in the summer months.
The next step is to actually grow something. Basil is probably the one to try, as it really likes the hydroponics setup.
One thing I've not considered are the nutrients. There is some good literature on the subject out there, but I've not thought about how best to deliver it. Building a better solar circuit, one that allows monitoring and the addition of extra panels would be great! Finally, I need to have the system report back to my home server with a series of reports. Things like temperature, pump duty cycles, panel and battery voltages, etc. There's still quite a lot to do on this project, but it's getting there.
