
I've been getting into biohacking. It's slow going and there's a fair bit to learn. However, there is a company called the odin who will sell you kits. They seem fairly straightforward - you can even order them from Amazon! So I figured I'd grab the e-coli and yeast kits and go from there. I thought I'd practice with the e-coli as modifying yeast seems a little more useful and interesting.
The e-coli experiment you can buy is an attempt to create bacteria that can survive on an anti-bacterial plate of agar. This particular kind of agar restricts growth but apparently there is a modification we can make that will help the bacteria survive. We can insert this DNA as a plasmid (a circular loop odf DNA) that has been modified with CRISPR into our bacterium. Once it's in there, the cell machinery will read it and translate it into the protein that helps the bacteria survive. We can break down the process as follows:
Temperature control seems to be a major part of all this. Things either need to be kept cool or heat-shocked or at a nice growth temperature. I figured I'd need to make some kind of incubation chamber but wasn't quite sure. I thought some kind of peltier solution would be best, but in the end, my friend Charles suggested that a mini-fridge would be best. The reason being is they are basically a peltier anyway, and that some of them even have the option to heat instead of cool. I bought one from ebay and set to work modifying it. All I needed to do was attach the same test box I used for my sous vide cooker. It basically takes mains voltage, drives it down to 5v for an arduino, and has a massive relay in between it and the load.
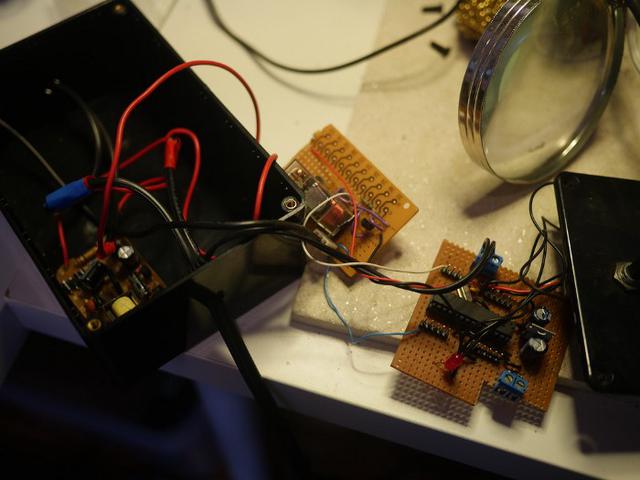
Since I've moved to the USA I needed to change out the plugs and what not. Turns out the transformer I used could cope with 110 volts, so all that was needed was to replace a few wire. I say all, I actually had a fair bit more to do because there were loose connections and mistakes here and there that I had to fix. With that done, I can now set the temperature I want and the fridge will attempt to meet it, turn off when it gets to temperature and back on if the temperature gets too low.
I made sure that everything was roughly calibrated up by comparing the readings on the box with two other thermometers.
My wife already uses the bathroom for her rolling mill, so I didn't feel too bad about storing all my gear in there too! Unfortunately, parts of the kit need to be stored at a variety of temperatures, some around 4 degrees and others at -40 degrees! So that means I ended up with e-coli vials in the fridge and transformation mixes in the freezer!
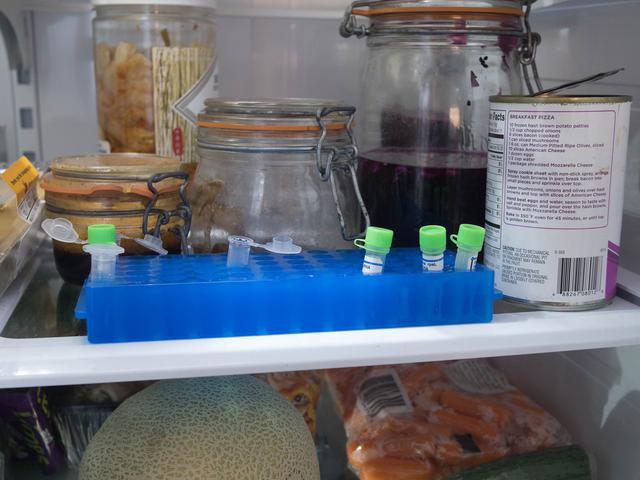
You need a few things to get going and the kit contains most of them. A very accurate pipette with tips, a rack to hold the small plastic vials, gloves, plates, plastic loops and a sharpie. Once I'd built the fridge, I figured I had enough to get going. Being in a bathroom helps. If I need to, I can always flush everything down the toilet!
This part is quite easy. I take the e-coli out of fridge and let it get to room temperature, then make the plates. The plates are filled with agar which works a bit like a jelly. It comes as a powder and is added to warm water and then allowed to set. With a microwave and glass bottle, I warm up the water and agar mix, give it a shake and pour it into the plates and allow them to cool. Once set they go into the fridge.
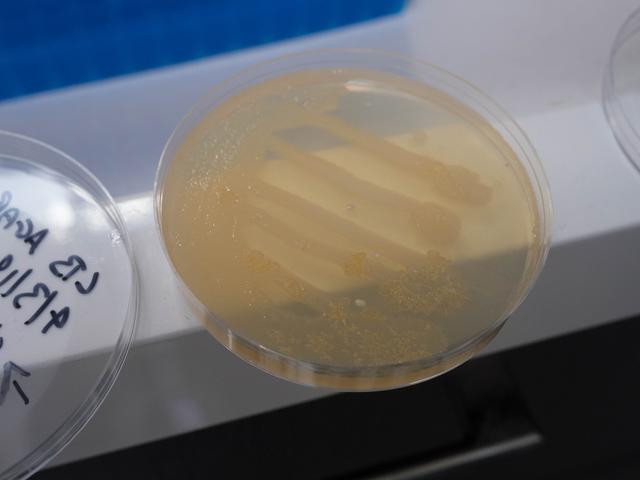
When we want to grow the bacteria, we take the long, plastic sticks with a small loop at the end, and dip them into the e-coli vial, sort of like a bubble blower. You then scrape out the loop along the agar, streaking out the bacteria. Once that's done, the lid goes back on the plate and is marked with date and time. A top tip I was given is to mark the bottom of the plate. Makes sense when you think about it - the lids can often be lost or swapped (apparently!)
27 degrees C seems like a good temperature to grow bacteria at. I left the plates over night and about 12-16 hours later, we'd gotten some good colonies.
This is a two step process. Before we heat-shock, we need to add some transformation mix to a vial, then scrape off some e-coli and add it to the mix, along with our CRISPR vials and what not. Apparently, the mix is Calcium chloride with polyethylene glycol (PEG)3350. Apparently this mix, along with the heatshock, makes the bacterial walls more permeable, allowing our DNA plasmids to pass through and enter the juicy, juicy innards!
The guide suggests about 42 degrees C for heat shock and to use a water bath. At first I figured I'd just use the bio fridge as it can get to that temperature, but then I figured that using water probably has something to do with how fast the heat is transferred. So I decided to break out my k-type thermocouple and use a pan of boiling water on the stove. Once it cooled to the right temperature, in goes the vial!
Once the heatshocking is done, the bacteria goes back into the normal, cold fridge, to cool off for a bit, before it gets added to a smaller vial containing a little agar.
So once we've got our transformed our e-coli, we can start to grow it on the two plates, just like before. It should grow on both plates, just like the one's we've already seen. However, we got this:
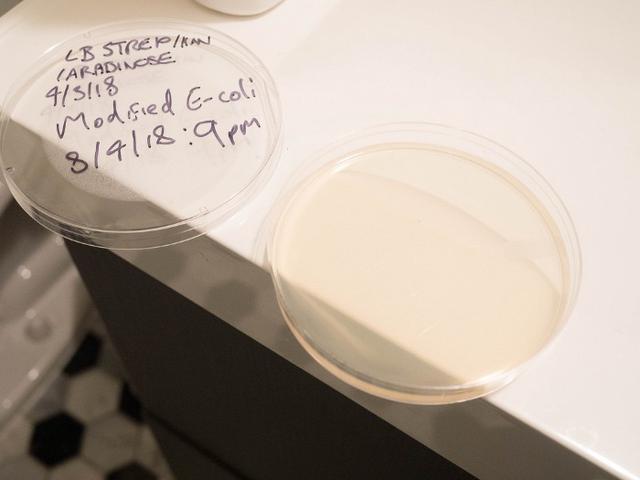
Looks like the bacteria didn't grow in the end afterall. Not quite sure what went wrong but I have a few ideas:
I think I'll carry on though. I still have my yeast kit left, which is a little more interesting. I figure I'll try that next and try and tighten up my processes.
