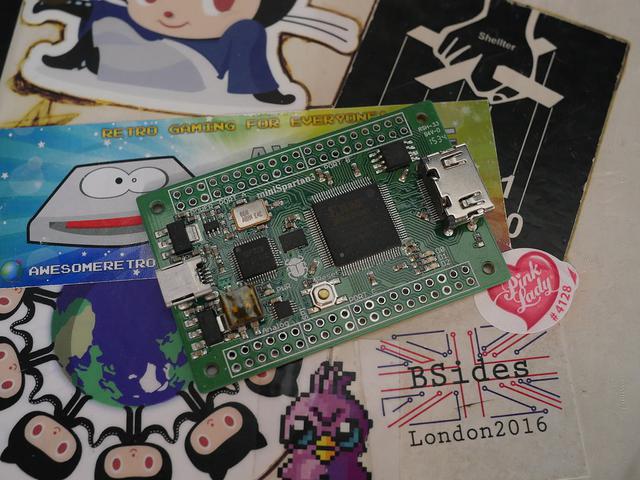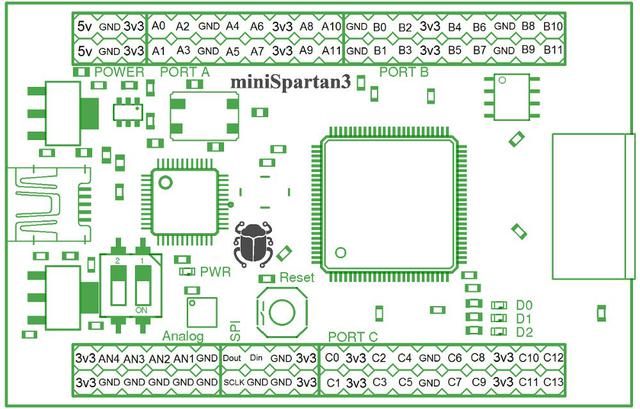


A long time ago, I bought one of the Scarab FPGA development boards which breaks out the Spartan 3 FPGA at a cheap price. Like many nerds, this sat in my box of bits for quite a long time. I've since started a project with my friend Will and although we are looking at a later Xilinx FPGA, I figured it might be worth trying to get this board setup, preferably on Linux. I had some trouble with this so if you've been having trouble getting this older board setup, I might be able to help.

Now Scarab have a custom IDE but this didn't work for me. Indeed, support is very limited for this board now. It's really beenn superceeded by other projects but at the time, it was quite popular and you can still do handy things with it I'd say.
I decided to use a virtual machine, and that Vagrant might be a good way to keep things organised. There are instructions on how to get the software to work on Arch Linux but it seems to be a lot more faff and using virtual machines keeps things neat, so after a lot of messing about and failure, I just decided to use Vagrant.
If you aren't familiar with Vagrant have a look at this link. I decided to go with the Ubuntu Precise Pangolin LTS Vagrant box which seems to work fine. It has all the bits in the right places and it's just a bit easier than messing around with things. Make sure you create a larger hard-disk. The following Vagrant file should work. I went with about 60G of harddisk space. Overkill a little. You might be able to get away with 30G instead. The Xilinx stuff takes up a lot of space.
Vagrant.configure("2") do |config| config.vm.box = "ubuntu/precise64" config.vm.provision :shell, path: "bootstrap.sh" config.vm.provider "virtualbox" do |v| v.memory = 4096 v.cpus = 2 v.gui = true v.customize ["modifyhd", "disk id", "--resize", "61440"] end config.ssh.forward_x11 = true end
Now my approach was to do all the building and work inside the VM. This means I need to use Xorg and get away from the headless approach. To that end, one needs install a lot of extra packages. The bootstrap.sh file looks a little like this:
#!/usr/bin/env bash apt-get update apt-get -y install accountsservice acpid adduser apparmor apport apport-symptoms apt apt-transport-https apt-utils apt-xapian-index aptitude at base-files base-passwd bash bash-completion bc bind9-host bsdmainutils bsdutils build-essential busybox-initramfs busybox-static byobu bzip2 ca-certificates cloud-init cloud-initramfs-growroot cloud-initramfs-rescuevol cloud-utils cmake cmake-curses-gui command-not-found command-not-found-data console-setup coreutils cpio cron curl dash dbus debconf debconf-i18n debianutils default-jdk diffutils dmidecode dmsetup dnsutils dosfstools dpkg e2fslibs e2fsprogs ed eject euca2ools file findutils firefox fonts-ubuntu-font-family-console friendly-recovery ftp fuse fxload gcc-4.6-base gdm geoip-database gettext-base gir1.2-glib-2.0 git-gui gitk gnome-session-fallback gnome-terminal gnupg gpgv grep groff-base gzip hdparm hostname ifupdown info initramfs-tools initramfs-tools-bin initscripts insserv install-info iproute iptables iputils-ping iputils-tracepath irqbalance isc-dhcp-client isc-dhcp-common iso-codes juju kbd keyboard-configuration klibc-utils krb5-locales landscape-client landscape-common language-selector-common laptop-detect less libaccountsservice0 libacl1 libapt-inst1.4 libapt-pkg4.12 libasn1-8-heimdal libattr1 libbind9-80 libblkid1 libboost-iostreams1.46.1 libbsd0 libbz2-1.0 libc-bin libc6 libc6-dev-i386 libcap-ng0 libclass-accessor-perl libclass-isa-perl libcomerr2 libcurl3 libcurl3-gnutls libcwidget3 libdb5.1 libdbus-1-3 libdbus-glib-1-2 libdevmapper1.02.1 libdns81 libdrm-intel1 libdrm-nouveau1a libdrm-radeon1 libdrm2 libedit2 libelf1 libept1.4.12 libevent-2.0-5 libexpat1 libffi6 libfribidi0 libftdi-dev libftdi1 libftdipp1 libfuse2 libgc1c2 libgcc1 libgcrypt11 libgdbm3 libgeoip1 libgirepository-1.0-1 libglib2.0-0 libgmp10 libgnutls26 libgpg-error0 libgpm2 libgssapi-krb5-2 libgssapi3-heimdal libhcrypto4-heimdal libheimbase1-heimdal libheimntlm0-heimdal libhx509-5-heimdal libidn11 libio-string-perl libisc83 libisccc80 libisccfg82 libiw30 libjs-jquery libk5crypto3 libkeyutils1 libklibc libkrb5-26-heimdal libkrb5-3 libkrb5support0 libldap-2.4-2 liblocale-gettext-perl liblockfile-bin liblockfile1 liblwres80 liblzma5 libmagic1 libmount1 libncurses5 libncursesw5 libnewt0.52 libnfnetlink0 libnih-dbus1 libnih1 libnl-3-200 libnl-genl-3-200 libnss-myhostname libp11-kit0 libpam-modules libpam-modules-bin libpam-runtime libpam0g libparse-debianchangelog-perl libparted0debian1 libpcap0.8 libpci3 libpciaccess0 libpcre3 libpcsclite1 libpipeline1 libplymouth2 libpng12-0 libpolkit-gobject-1-0 libpopt0 libpython2.7 libreadline6 libroken18-heimdal librtmp0 libsasl2-2 libsasl2-modules libselinux1 libsigc++-2.0-0c2a libslang2 libsqlite3-0 libss2 libssl1.0.0 libstdc++6 libsub-name-perl libswitch-perl libtasn1-3 libtext-charwidth-perl libtext-iconv-perl libtext-wrapi18n-perl libtimedate-perl libtinfo5 libudev0 libusb-0.1-4 libusb-1.0-0 libusb-1.0-0-dev libusb-dev libuuid1 libwind0-heimdal libwrap0 libx11-6 libx11-data libxapian22 libxau6 libxcb1 libxdmcp6 libxext6 libxml2 libxmuu1 libyaml-0-2 linux-headers-generic linux-image-virtual linux-virtual locales lockfile-progs login logrotate lsb-base lsb-release lshw lsof ltrace makedev man-db manpages mawk memtest86+ mime-support mlocate module-init-tools mount mountall mtr-tiny multiarch-support nano ncurses-base ncurses-bin net-tools netbase netcat-openbsd nfs-common ntfs-3g ntpdate openssh-client openssh-server openssl parted passwd patch pciutils perl perl-base perl-modules pkg-config plymouth plymouth-theme-ubuntu-text popularity-contest powermgmt-base ppp pppconfig pppoeconf procps psmisc puppet python python-apport python-apt python-apt-common python-boto python-chardet python-cheetah python-configobj python-crypto python-dbus python-dbus-dev python-debian python-gdbm python-gi python-gnupginterface python-httplib2 python-keyring python-launchpadlib python-lazr.restfulclient python-lazr.uri python-m2crypto python-minimal python-newt python-oauth python-openssl python-pam python-paramiko python-pkg-resources python-problem-report python-pycurl python-serial python-simplejson python-software-properties python-twisted-bin python-twisted-core python-wadllib python-xapian python-yaml python-zope.interface python2.7 python2.7-minimal readline-common resolvconf rsync rsyslog ruby rubygems screen sed sensible-utils sgml-base ssh-import-id strace subversion sudo sysv-rc sysvinit-utils tar tasksel tasksel-data tcpd tcpdump telnet time tmux tzdata ubuntu-advantage-tools ubuntu-keyring ubuntu-minimal ubuntu-standard ucf udev ufw unattended-upgrades unzip update-manager-core update-notifier-common upstart ureadahead usbutils util-linux uuid-runtime vim vim-common vim-runtime vim-tiny virtualbox-guest-additions-iso virtualbox-guest-dkms virtualbox-guest-utils w3m wget whiptail whoopsie wireless-tools wpasupplicant xauth xkb-data xml-core xterm xz-lzma xz-utils zlib1
This is a little overkill - I should probably cut this down but all the packages you need seem to be there.
The version I'm using of the Xilinx ISE is 14.7.
The newer program, Vivado is what Xilinx would like you to use now. You can still get this older package from http://www.xilinx.com/support/download/index.html/content/xilinx/en/downloadNav/design-tools.html here.
The Arch Linux page has some good advice on how to install this if you get stuck: https://wiki.archlinux.org/index.php/Xilinx_ISE_WebPACK.
Ultimately, the Xilinx ISE Webpack is freeware, but you will need to download a licence. These are now available from Xilinx for free.
Copy the installation files into your shared vagrant directory and then copy it into your VM. If you are using VirtualBox, you can launch the VirtualBox program itself and see your machine running away. Double click on the machine and you'll get a screen you can interact with - your Xorg window. From here we can run the installer.
tar -xvf Xilinx_ISE_DS_Lin_14.7_1015_1.tar ./xsetup
As we are running in a VM with a head, the visual installer should work fine.
So the first thing to do is make an LED flash right? It is the helloworld of hardware afterall. We need to launch the design tools first though. Assuming you followed the standard install you can do this:
source /opt/Xilinx/14.7/ISE_DS/settings64.sh ise
From here you have a couple of choices. Start a new project and work it though, or copy the project I've uploaded to git - https://github.com/OniDaito/Scarab3HelloWorld
I'll be writing up this basic LED tutorial in another post, along with a little more about FPGAs in general. For now though, there is a good tutorial you can find at http://users.wpi.edu/~rjduck/Spartan3_Tutorial.pdf. It is a little old but gets across the basics.
