
This year, I finally got off my arse and wrote a demo for the NOVA 2025 Demoparty. You can watch it below on YouTube. I fancied doing a little tribute to Anthony Gormley's Another Place, and more broadly to the North West of England in general. It placed first in the New School PC Demo Compo.
If you aren't familiar with the Demoscene, I've mentioned it before but in a nutshell, it's computer art with some added hacking and competitions and challenges thrown in. Make beautiful art, but on a Commodore Amiga. Got a great idea for a dance track? How about playing it off a gameboy? An amazing 3D effect? Can you do it in just 4K? That sort of thing.
So I'm from the North of England (maybe surprising to some, but the clues are there if you know where to look). Specifically, the North West. The coast, from Liverpool to Lancaster is where I hail from. Although I love the North generally - I live in Scotland afterall - the North West is forever a part of me. If I was a character from Game of Thrones, I figure Ned Stark is about as close as you can get! I'm sure everyone (or most folks) have some deep connections to the place(s) they grew up in, aso I felt it necessary to make a demo about this place.
Anthony Gormley is a British artist, most famous perhaps, for his famous iron sculpture The Angel of the North. This huge, imposing statue can be found near Gateshead, next to Newcastle, in the North East of England. However, across the Pennines, in my neck of the woods, he made his mark on Crosby Beach with his installation Another Place.
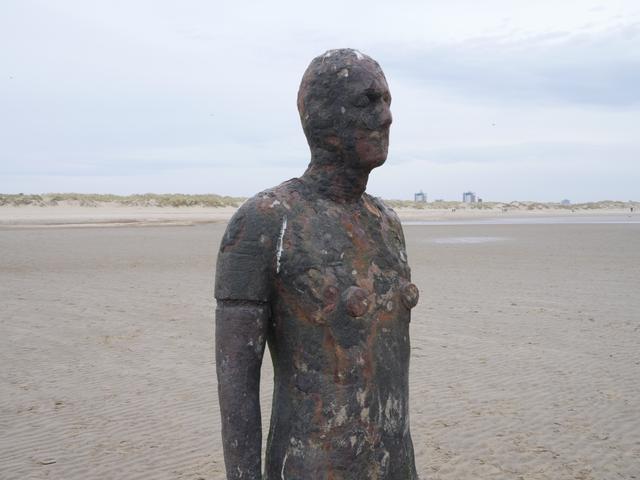
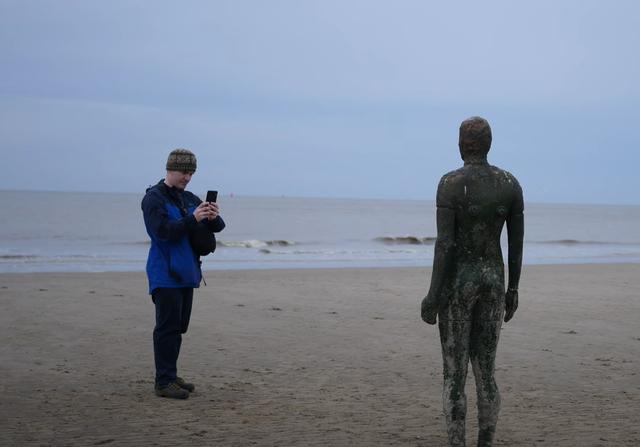
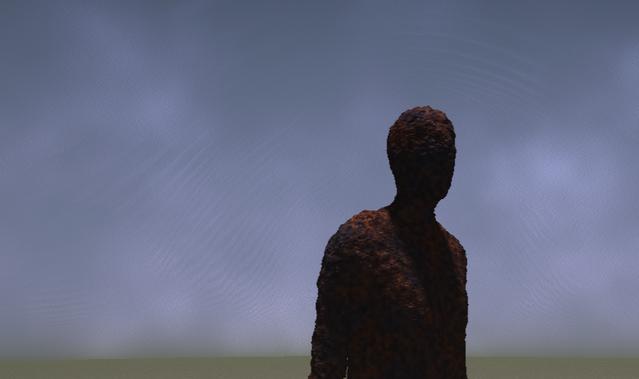
Another Place consists of several cast iron statues - each is a copy of Gormley's own body. They are all facing out to sea, slowly decaying, rusting or being colonised by barnacles. Twice a day, they are covered by water as the tide washes in and out. They've become quite the hit with the locals, sometimes folk will dress them up. People come from far away to walk the beach and take in the scene.
Both Another Place and the Angel of the North do something quite wonderful - transforming how we look at a place that might pass us by. I won't lie, the North West can be depressing and grim. The stone grey clouds are almost omnipresent. If it's not raining, it's mostly dull. Hot summers are rare in these parts and snow in winter is even rarer. Not only that, but it seems history has passed by the North West. There are almost no castles, very few stately homes or Roman sites to speak of. You have to work hard sometimes to see what's there.
Another Place does this quite well I think. The figures help to bring out the stark beauty of the place. Their weather worn, barnacle covered exterior reminds me of the power of the sea.They look away, to - well - another place, as if to invite the visitor to do the same. Many ships left Liverpool and Crosby for destinations across the world - for good and for ill.
Despite the figures looking outward, it makes me look inward, at Lancashire, Merseyside, Cumbria - reflecting on how they've changed over the centuries. For this reason, I thought it would make an interesting study for a demo.
The statues really are the main event here. For any demo I'd need some sort of resource to draw from. I found this model online and it's not bad. However, I thought I'd have a go at making my own. I decided I'd take a trip to Crosby and do a little photogrammetry.
I took my Lumix GX8 with me, as well as my Google Pixel 8 and I think, in the end, the Pixel 8 won out! I used the program Reality Scan which isn't too bad, though all the things you scan - I suspect - become publicly available and the property of whichever company owns that app. But for this purpose, it wasn't so bad. With my main camera I generally go with Metashape, which does a great job. However, I think my camera technique needs a little more work. I should have brought a step ladder with me, as getting the top of the head proved impossible, leading to some necessary cleanup.
I also took plenty of mood shots - photos of the sea, sand, sky and the buildings beyond. With all this in the bag, I was ready to get to work.
On modern, consumer computers, whether it be Linux, Windows, OSX or other, demos tend to be dominated by the Fragment shader. In a nutshell, your modern graphics card will have some sort of pipeline; 3D data goes in one end, pixels come out on the other. There are many steps in this process; it is quite involved to say the least. In the past, most of this was hidden from the programmer, but as time went on, several steps could be customised using small programs known as shaders. There are several such shaders; the vertex shader lets you mess and move around with the vertices you send to the GPU. The geometry shader allows you to create and change the geometry. But our main interest is in the Fragment Shader. This step is close to the end of the pipeline. We are ready to draw a pixel to the screen, but we have a chance to modify it first.
If you want to see what pixels shaders can do, head over to ShaderToy - an excellent site that showcases some of the best talent when it comes to producing gorgeous productions using nothing but pixel shaders and WebGL.
If you are creating a demo with no restrictions - such as in the Modern PC Demo at Revision Demoparty - then the process could be very similar to making a 3D game engine, or a movie or whatever. No part of the GPU or CPU is off-limits. However, if you are aiming to make a demo for a 64K entry, you have to cut a lot of corners to get everything you want on screen to fit. So most folks put the majority of their demo inside the fragment shader.
I decided to try for a 64K demo or less, running on Linux. Linux has a particular challenge in that there is no one standard distribution. This is arguably, Linux's greatest strength as it can be tailored to fit whatever problem you want to solve. However, for the demoscene it makes things a little tricky. Nevertheless I got to, using a Linux Framework by PoroCyon - a scener who has done sterling work on Linux sizecoding. I wont go into the details of how this all works - I don't really know them myself - but suffice it to say there are a lot of little tricks, tools and techniques combined into a single, buildable project. You put in your shader and music, type make and out pops a tiny executable.
The framework uses either the SDL or GTK to get a window on screen. OpenGL is used to get the 3D context, shader pipeline and all that jazz going. Vulkan could also be used but it requires much more code to get going and for little benefit in our case. I generally have more luck with the SDL, so I stuck with that. The music would be rendered using a synthesizer inside the binary, then played with the aplay program. All seemed fairly reasonable.
This is not how it all ended up going in the end - let's leave this as a bit of foreshadowing! ;)
So how do you draw shapes using a pixel/fragment shader? The accepted technique seems to be Pathtracing. The fragment shader gives you a position on the screen where a pixel will be drawn. We can treat this position like a direction and shoot a ray from our virtual eye, out into the world in the direction of this pixel. Wherever it lands, we set the colour to the colour of the thing it has hit. We repeat this for all the pixels on the screen, building up the picture. The GPU can do this very quickly thankfully.
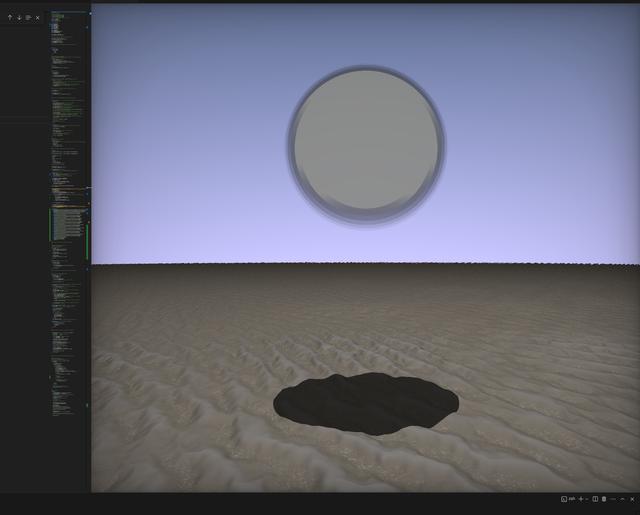
So how do we represent our scene? How do we know what a ray has hit? Well, we use a Signed Distance Field. The simplest such field is a sphere. A sphere can be defined as a point and a radius. If I take any other point in space, I know how far I am from the surface of a sphere using the following equation:
Now if the distance is very small (almost zero), we know we've hit the sphere. But what if the distance is not zero? Well, we can advance along the direction of the ray we sent out from our virtual eye whatever distance we found and try again. Repeat until we hit something or advance out of the scene.

Now imagine we have many such fields, one for every object in our scene. We can test our eye ray position against every field and advance by the smallest amount we find. We keep going until we either hit something, or we pass beyond a maximum distance from our virtual eye.
This technique is in use all over the demoscene for modern, 3D effects. It can be used in conjunction with many others in order to produce a final demo. But spheres are simple. How can we get an equation for a Gormley statue?
At first, I thought I'd have to model the statue myself. Maybe use a distorted sphere for the head, a tapered box for the body, that sort of thing. I did find such a model already exists in this shader.
In the end though, I came across a technique called Siren - a sort of neural network that uses the sine function as it's activation function, or so I understand it. Like many machine learning techniques, the goal is to approximate the function we believe exists to map one set of parameters to another. This approximation is learned automatically by a neural network, trained on what we want it to learn - in this case a 3D position goes in, a single depth value comes out.
I am indebted to the work of Blackle Mori, who first brought this technique to my attention. They've done the majority of the work here in getting a network together. I revamped the code, added a few features and gave it a try. The results were ..... mixed?
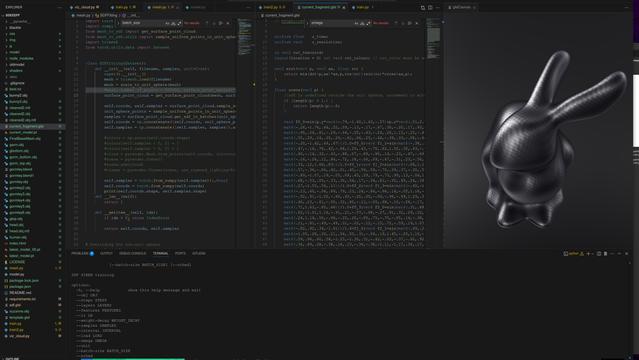
The example Blackle gives is the Stanford Bunny. This is a classic model in the computer graphics world. It works well with this approach, largely because it doesn't have much in the way of fine detail. Nor does it have any considerably steep gradients across the model, save for the ears. In fact, during my experiments it was the ears - more often than not - that were incorrect. By gradients, I mean imagine you are tracing your finger over the model. Most of the time, it will feel quite smooth but as you get to the ears there's a sudden turn, followed by a smooth area, then another sharp turn. Modelling these steep, almost discrete gradients is not easy for any sort of neural network.
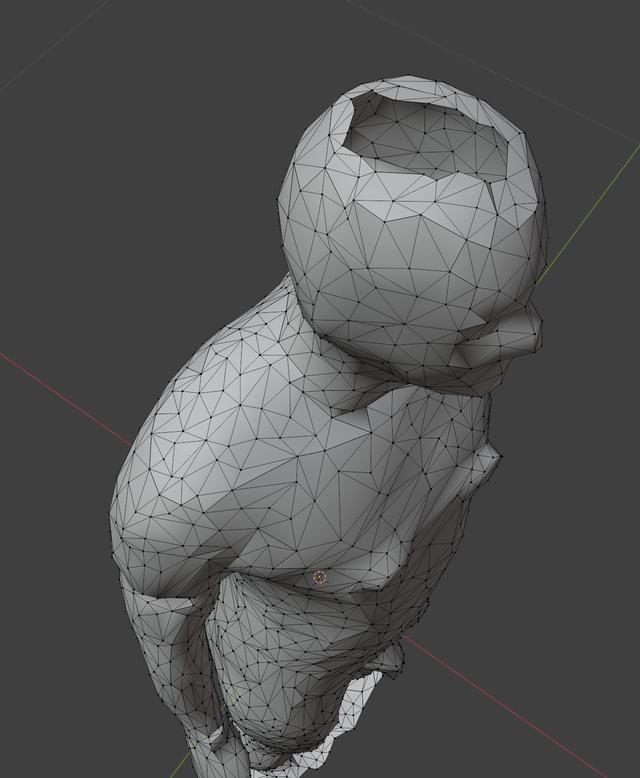
Now lets look at the Gormley statue. It has varying levels of detail - the face (and the penis of course!), are finer in detail compared to the body. The cylindrical sections are quite sharp in detail too. The arms and legs are separated from each other and the body by long thin gaps. Basically, this is not a good object to try and model. Nevertheless, I stuck at it. Many, many failures ensued. Typically, the arms would be joined to the body, or the legs would be joined to each other. Fine detail, such as the nose would be absent. I tried increasing the size of the network, changing all the hyper-parameters, but there was very little in the way of improvement.

I had one idea - split the model into three separate fields - head, torso and legs. This did result in a better model, except for where the joins had to be made. Even though these networks are quite small, having three fields resulted in poor performance - a drop in the frame rate. So I decided to ditch that idea and use the best model I had. I added a few cylinders to match these on the photos.
Nevertheless, I think this approach has potential! I've released the source code on github if you want to have a play. It spits out a GLSL shader you can use in the SHADERed vscode plugin, but a few small changes will see it working in Bonzomatic or Shadertoy.
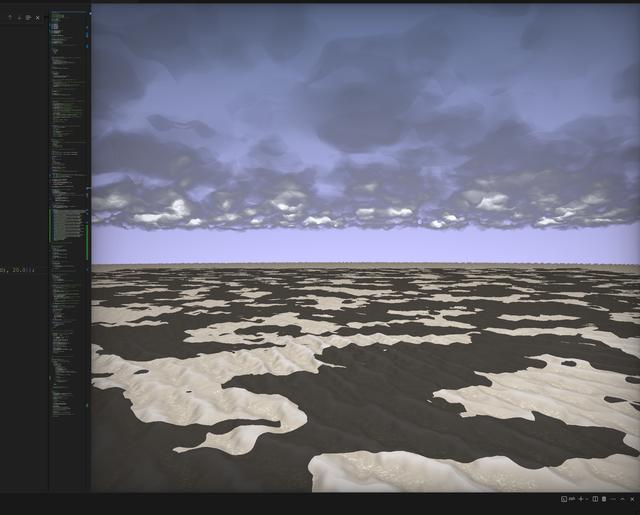
I found an excellent article on how to render clouds. I mentioned that clouds were quite the feature of the Northwest. I decided to walk through this article as the resulting clouds were quite engaging, even if they aren't quite the same as the ones in my photos. These clouds are volumetric; rather than considering them as a hard surface and stopping our ray-march, we progress through them at a fixed step, accumulating the light as we go. The sky itself is a dome, centered on our virtual eye. When a ray hits the dome, we start our volumetric rendering.
The whole process is better described in that article, but one key element is the Finite Brownian Motion algorithm employed to create the random looking clouds. This function creates a nice looking random effect that I use throughout the rest of the demo.
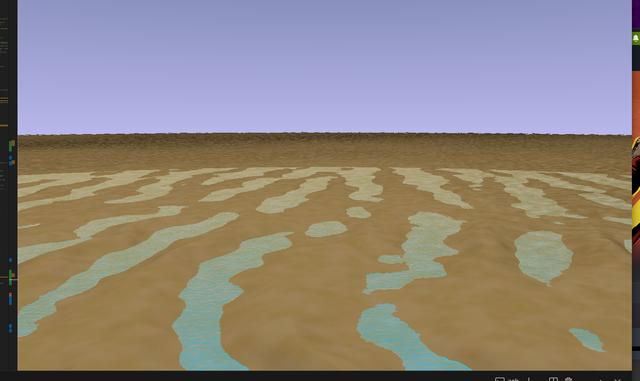
The sand was a little trickier. I found this excellent example on Shadertoy and began to adapt it. There are two key effects that make it look like Crosby beach. The first is that I use two colours of sand, based on the height. This is to give the impression of wet sand, which is darker. Without it, the beach really doesn't look right. At one point I actually tried to render water, but I found the process quite tricky and couldn't get it right (Water rendering is a bucket list item for me I think. I'll have to give it a go in the future). The second change was to use a noise function to render the broken bits of sea shell that lurk at the bottom of the furrows of sand. I'm glad I took photos of the beach - I'd have never have thought to render such things but it really adds to the authenticity.
The lighting model is rather simple - Phong shading with a single light source. I figured this looked good and was quick enough on this rapidly growing shader to not hurt the performance.
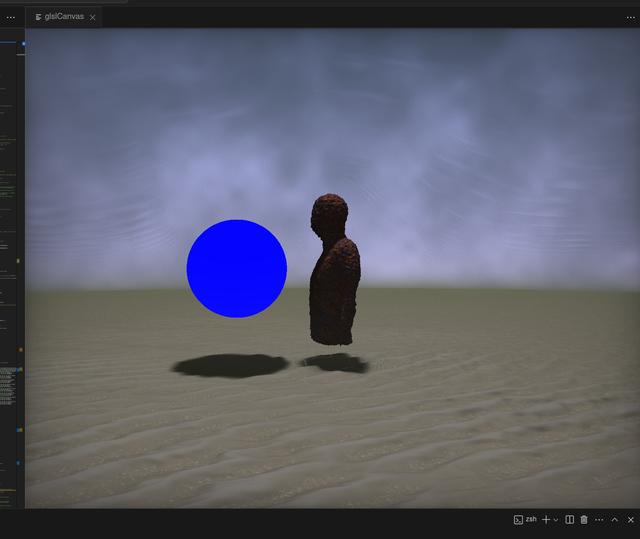
The shadows were a bit more of a problem however. I wanted some nice, soft shadows. Inigo Quilez has some good examples on his site. I tried a few but the results weren't great. I suspect it's because the statue is a complex SDF; most of the scenes I've seen with good shadows tend to be made up of well defined primitives.
I was running out of time at this point, so I didn't spend too long on the lighting. I think there's more I could do here, in the future.
The same fBm function used in the cloud rendering can be used to generate the rust effect on the statues. This works in two ways. Firstly, the material of the statue - the colour returned when the ray hits it, can be chosen from a mixture of three colours, depending on the results of the fBm function. This gives an attractive, random pattern, rather than just raw noise. Secondly, one can alter the distance field itself, making the surface look bobbley or pitted.
I made the statue a little skinnier before adding extra rust. To do this, you simple add a small offset to the distance returned from the field function.
The problem is that the fBm function is really costly to run, and we need to run it quite a lot when we get close to the statue. I did try using a texture, containing some interesting noise. It sort-of worked, but didn't quite look right. It also takes up a lot of memory, but I felt I had the space. I decided to keep this version on the back-burner, in case I needed it.
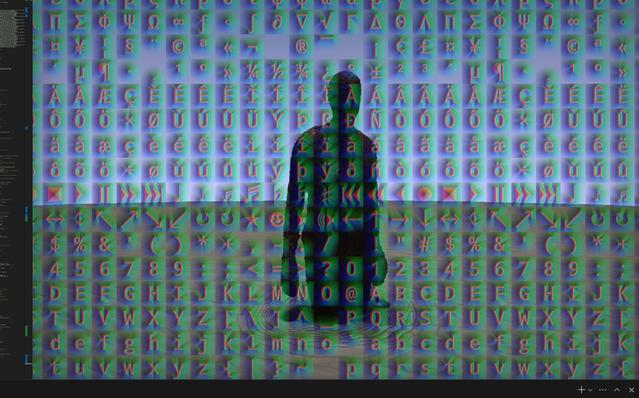
Writing text in a shader seems - at first - to be a very tricky problem, until I learned that you can draw text in pretty much the same way as you'd draw these 3D shapes - using a distance field. However, these fields would be in 2D only.
I found this article and this website that talk about distance field text, and even link to the tools you need to make the special textures you'll need. The method works by loading a texture (an image on the GPU basically) that contains all the characters you want to print. You then use part of that texture as your precomputed distance field. You check the location of your pixel against this image texture and the result you get back is the distance. There's a bit more to it in the paper, in order to get the best results, but even this basic version works a treat. I didn't know it was used in the game Team Fortress 2 but apparently it is.
However, we need an image, and this image will no doubt be large. I tried a few different image types, but jpg seemed to have the best compression. It was still around 20KiB though. Not ideal! Still, I embedded the jpeg data inside the binary and used libjpeg to decompress it. This adds a bit more code to the executable and the reliance on libjpeg which I supposed was fine.
Had I spent more time looking at the framework I was using, I'd have noticed that writing text is something the framework already does! Rather than using a jpeg image, the framework pulls in an SVG that contains the characters you might wish to display. At startup, this svg file is rendered to an image using librsvg. Used in this way, an .svg is much smaller than a jpeg. I'll be using this method next time.
One thing I noticed as the demo was coming together was a wierd banding effect around the statue. The sky around the statue would not render correctly - it looked as if it was flowing around the statue in discrete bands. I couldn't quite figure it out.
In the end, some folks on the Demoscene Discord gave me some hints; when a ray hits the skydome it might not hit it at exactly the same spot, especially if it's passed near another object. The key to fixing this was to center the dome over the virtual eye, no matter where that eye is. Then, if a ray exceeds the scene and hits the dome, set it's distance to a fixed value. Voila! No more banding.
There are a number of extra little techniques I've used, some of which I picked up from this site. The first thing is a little ambient occlusion - works well on some of the recesses and such on the statue. Ambient occlusion works by sending out additional rays from the first point of impact and seeing how many are blocked after a short distance. This makes the recesses nice and dark. I used the code from this shader for the most part.
Inigo Quielez has a great article on fog, which I decided to follow. The fog helps to soften the transition between the sand and the sky, but it also hides a few sins - at such a distance, the angle at the middle of the screen is very small, causing a number of ugly artifacts.
Another little technique is a slight vignette over the finished scene. I picked up the code. Finally, a little tone mapping helps to make things look a little more realistic.
These are all subtle effects but they do add up. You certainly notice them when they aren't there.
I have absolutely no musical talent, as my revision entry will attest. So I figured it was time to reach out and see if any musician wanted to write some music for this demo. I asked around on the demoscene discord and a mysterious character known only as Altiga decided they'd have a shot. We spoke a little about the kind of vibe I was going for. I've never worked with a musician before so I can only assume I wasn't very helpful. Still the music they came back with is really good!
The framework I was using supports 4KLang, Clinkster and Oidos - all synthesizers that can create music from very small code files. However, Altiga was using Sointu - a new Tracker. Fortunately, Sointu is a fork of 4KLang and so putting in support for this was not too tricky.
With the music in place, the demo was really coming together! The final demo came in at a lean 28K! Not to bad I thought. I probably could have done better if I'd not used the jpeg based text. Or I could have added a few more textures, such as a noise texture, rather than rely on the costly fBm function. Still, under the limit and on time! Riding high...
... and then disaster struck!
I'd planned for all this to come together, working solidly every Monday evening since February. I'd finished on time, but one niggling little detail that I'd pushed aside came back to bite me - the ever moving target of Linux!
One of Linux's greatest strengths is that it can be tinkered with, tailored, customised and remixed as much as you like. However, as mentioned earlier, this can be a weakness in the demoscene. The organisers at NOVA hadn't settled on a particular distribution, so I was coding for my own desktop running Arch Linux.
Now music and sound has never be the best on Linux, but it is improving through the likes of Pipewire. For some reason however, the music had stopped playing on my main box. I tried on other machines but no dice. I tried other distributions - still no sound. At this point I was panicking! I was only a few days away from the party. What could I do?
The biggest problem was the framework I was using. Because it is so optimised, so engineered and tuned to get the size down, it was hard to change. The music is played by rendering a wav file to memory using the Sointu synthesizer inside your binary. This memory location is then piped to the program aplay(which exists on the majority of Linux machines) which plays the music. For some reason, aplay wasn't playing anything.
My mistake was not understanding all the things the framework does. Right at the beginning of the project I said to myself "I should go through all this and tidy it up. Understand it and make it my own". I never did and it came back to bite me. I couldn't figure out what to do about the sound. I tried a number of things but no luck1.

So I made a tricky choice. I spoke with the organisers, told them I'd bring a Linux distro they could just plug in and run the demo on. I'd enter the PC Unlimited competition instead of the 64K competition and ditch the framework entirely!
Quite a drastic thing to do at the last minute right? Well, perhaps not as bad as you might think. There are a great many example programs out there that draw a single quad to the screen in Linux using the SDL. Most of the work is in the single shader and the music. Porting it over didn't take very long. I could choose to play the music however I wanted, which got around the problem. However, this meant my demo was more like 50MiB instead of 28KiB. Amazing isn't it?
It took far too long to get a good distro running on a USB stick though. Quite long indeed! Things have moved on a lot since this framework was made. Again, one of Linux's strengths and weaknesses. I couldn't find one that had all the things I needed. Ubuntu has the nVidia drivers, but no SDL library. EndeavourOS had it all but wouldn't full-screen properly. I can sympathise with folks who don't know where to begin with Linux.
After a lot of messing about, I settled not on one, but two approaches. I had a spare SATA SSD lying around with the USB caddy to fit. I install Ubuntu Linux on that, with the extra libraries I needed. I did the same on a USB stick, substituting Ubuntu for PopOS!. Installing Linux or, well, anything from a Live USB stick to a new USB stick takes an absolute age - Ubuntu took 2 hours! Unbelievable! USB 2.0 can be quite slow I suppose.
This was the last hurdle to jump. Performance of the demo, particularly the music, was variable on both approaches, with PopOS! being quite bad. At this point, I was despairing quite a bit. A lovely chap from the Dundee Hackspace Discord suggested I used f2fs rather than FAT on the USB disk, but the Ubuntu installer didn't quite like this; it produced a non-working install. So I settled on one last roll of the dice - a RAM Disk.
Linux makes it quite easy to setup a small filesystem in main memory. I could copy the entire demo into memory and then execute it, hopefully eliminating the choppiness of the sound. To my delight, it worked! This does mean the organisers would have to move the files into RAM when the OS had finished booting, but I'm sure they'd be fine with it.
I needed to make two recordings of the demo - one for youtube and another live recording for NOVA.

The framework has a feature where it dumps each frame to stdout as well as the screen. This can be piped to ffmpeg, creating a high-res video at 60fps. As the demo can take as long as it wants to render each frame, the music must be turned off and put back in later, once the recording has finished. This seems to be the way most demos are recorded for youtube. Some folks render at a much higher, 4K resolution, so it looks as good as it can do on YouTube.
The live recording was much harder. This recording is essentially, the demo running, in real-time. I tried using OBS and various other screen recording software, but this was a fool's errand! The way to do this is to record the HDMI output with a second machine. I have two USB based HDMI capture dongles. Both are somewhat poor sadly, but one recording I managed was reasonable. I think I might need to invest in a better capture system next time.
NOVA 2025 was a good event for me. I came first in two categories and second in two more. I suspect a large part of that has to do with the categories I entered being not super popular; there were only 3 entries in the PC competition. I'm told that NOVA skews towards the older, retro systems. Certainly, that competition was super fierce. I feel that having a goal, a story, really helped me. I think folk liked it. Can't ask for more really.
There are an awful lot of things I'd change. The statue model isn't Gormley enough I think. I would probably generate a better model and perhaps build the statue from basic SDFs instead of using the neural network, machine learning approach. The rust effect needs improving, as does the material. Some barnacles, green seaweed and such.
I had started to look at water - adding pools, waves and the sea. It's something that's really missing from this demo. I did give it a go, but it's quite hard to get right I think. Crosby and that whole coast is very sandy, so I can fudge it a bit, but I do think it would be better to have some of the sea in there.
The clouds aren't quite right either. That overcast sky is super tricky to get right. The lighting model is a little simple and I think I could have modeled the sun a little better.
Using the SVG approach to render the text is an excellent idea, and one I should have used. I'll likely need to have some sort of progress bar at the beginning of the demo to show how much pre-calculation is left to do. Indeed, the music would take quite a while to render before it started playing, so such a thing will be essential going forward.
These days, there's (almost) no excuse to not have anti-aliasing. In order to do something like fast, approxmiate anti-aliasing you need to do a second pass. The first pass renders everything to a texture. The second pass peforms the FXAA and then sends data to the screen. I'd have needed to set this up from day one, but totally missed it.
I'm pleased with the sand effect. I think it could be better but I'm not sure how I'd go about improving it. It doesn't quite have the gritty look when viewed up close.
The biggest lesson I've learned is that I need to really master my tools. I relied on a framework that I'd used over 5 years ago, assuming it would still work. I didn't take the time to learn exactly how it worked either and that cost me dear towards the end of the production.
Things have changed a fair bit in the Linux world, particularly around sound - I still don't have a good handle on it. The SDL is now on Version 3 and I'm pretty sure GTK has changed a bit too. It sounds obvious to make sure all your tools are up-to-date. It's much harder when you only have a couple of nights a week and you are trying to learn a whole lot of new stuff.
Never-the-less, I made it! I'll make sure I'm all tooled up for the next demoparty. Maybe Revision?
In the end, it was something to do with the system() call versus the execve() call. The former works but the latter does not. ↩
