
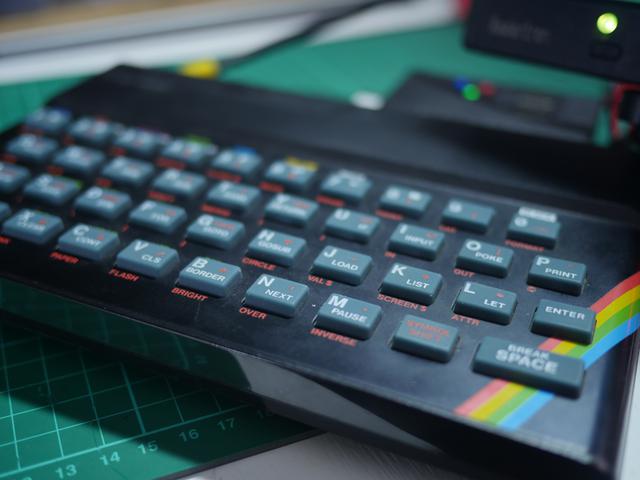
The ZX Spectrum is one of these amazing little computers from the 80s. It inspired a great number of programmers, games developers and many other young people in the UK. It was the RaspberryPi of it's day. Sure, there were other computers out there with more impressive specifications, but the specky (as I affectionately call it) was a success. It set out to achieve one thing - get the UK populace into computing, and it did that. By being cheap, it was accessible; not everyone was lucky enough to afford the Commodore 64. Anything that wasn't deemed necessary to learn how to program was stripped out - the machine doesn't even have a power button! It's a good lesson in designing a solution to a problem and sticking to what is important.
I never had one back in the day, sadly. I managed to pick one up recently and give it a bit of an overhaul - modernising it somewhat. It's been almost a year since I first wrote about the spectrum, so it's high-time I learned how to use this lovely little machine. I'd like to guide you through what I've learned, culminating in a demo to be released at a demo-party in the near future.
If yout just want to dive right into the code, check out the companion repository at https://github.com/OniDaito/speccy.
There are two major languages for programming the Specky - Sinclair Basic and Z80 Assembly. I'll talk briefly about the former, but I'm going to focus on assembly in this series. Why? Because learning Assembly is still quite useful today. For instance, I've written a small amount of ARM assembly before in the Battery Controller Project. While Z80 assembly isn't the same thing, the concepts and approaches are quite similar - you need to know about registers, special commands, vector tables and stacks.
Sinclair Basic is a variant on BASIC, a popular language at the time. The speccy boots up into the BASIC interpreter on launch. Anyone who knows the language Python will be familiar with an interpreter. Many of the language keywords are printed on the keys of the specky; you need only press the 'J' key to get the keyword 'LOAD' for example.
The classic program, Hello World looks like this:
10 PRINT "Hello, World!"
Pretty straight-forward right? BASIC has one important use for us when we program in assembly - it can launch our programs for us. If we compile our assembly language into a big blob of binary, then stick it into memory, we need to tell the Spectrum Interpreter that we should go to this memory location and run the program. This is the first thing I learned - all programs written in assembly, that are compiled and loaded into a specky, need some sort of loader. Something like this:
20 LOAD "" CODE 32768
30 RANDOMIZE USR 32768
This little code snippet tells the interpreter to go to memory location 32768 and start running. Although, as it turns out, we don't actually have to write this, if we use the right compiler or utility. Some include an option to add these lines for us - bin2tap being such a program. All we need to do is remember to pass the right flags to our compiler.
I fancied learning some assembly for a number of reasons - creating a demo on the specky gave me a very good excuse. Assembly languages have a very strong correspondence with the underlying architecture of the system in question; typically there is a 1-to-1 relationship between a machine code instruction and an assembly instruction. Assemblers support a few extra useful directives, such as labels, the ability to include separate files into one program, comments and macros. But the main thing about assembly on the specky?
It's fast!
Really, it's the only way to get peak performance out of this little machine, as far as I know. By stripping out every extraneous command, you can push the Z80 to it's limits. Experienced programmers can do amazing things in assembly, such as this lovely demo ZX Clive by Polish ZX All Stars.
But make no mistake about it, Assembly is quite low-level. I can't speak for everyone but I found it tricky to get started with. So many conveniences of high-level languages just aren't there. You are right down at the bare-bones. That's the price of power.
But let's dive in and see if we can at least get 'Hello World' on screen, using some assembly.
All of my introduction work can be found in a handy github repository https://github.com/OniDaito/speccy so if you want to dive right in, clone that repository and away you go!
I looked at a number of tools and settled on the following:
I've found that under Linux, it's best to build libspectrum and fuse rather than use the Debian branch. For some reason, Fuse has trouble loading the tap files otherwise.
This is all you really need I'd say, but I did come across a few other useful tools that might be handy:
I roll up all my commands in a bash script, as I work on Linux, but I've seen folks setup Visual Studio to do Specky programming if Windows is more your thing.
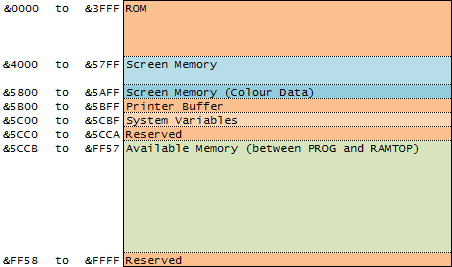
The memory map shows which bits of the memory inside the specky are used for which purpose. It's not something you really wonder about in modern programming, but since we are dealing with the CPU, close to the metal, we need to be careful which bits of memory we mess with. Folks who do embedded programming with ARM chips for example, will probably be familiar with this sort of thing.
For our purposes we are interested in the available memory (in green in the diagram) and the screen memory (in blue). We will load our program into a spot between 5CCB and FF57. When we start drawing, we will write into the memory starting at 4000.
The ROM has some useful functions we might want to use. In our first program, we'll use one to help us write to the screen.
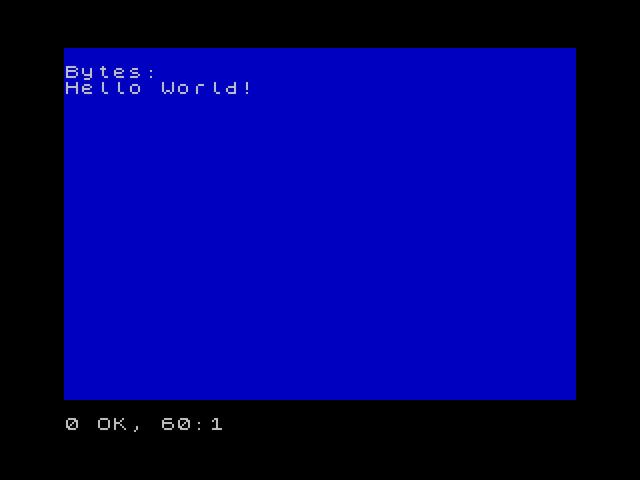
Once we can get a computer to print, say or otherwise communicate Hello world, we've begun our journey into programming. The syntax, the tooling and the basic building blocks are in place. So what does hello-world in Z80 assembly look like?
org $8000
  ld bc, STRING

LOOP
  ld a, (bc)
  cp 0
  jr z, EXIT
  rst $10
  inc bc
  jr LOOP

EXIT
  ret

STRING
  defb "Hello World!"
  defb 13, 0
At first glance, this seemed a bit tricky to me. But after a while, it began to make sense. In Z80 assembly (and assembly in general I suppose), we have access to registers. These are small bits of memory (8 bits in this case) that the CPU can access directly. Main memory can be accessed through these registers. We can pair up two registers to get 16bits if we like. This is pretty common when writing for the spectrum. There are 10 registers in total. 8 of these are paired and two are 16 bits in size. Some registers have special roles. For example, the a register is known as the accumulator and often gets used to store the results of various mathematical operations.
But I digress. Let's get back to the program at hand. The first line, org $8000, sets where our program will live in memory. ld loads a register (or pair of registers) with what comes after it. So the second line loads the register pair bc with the address, or location of whatever STRING is. So lets find that.
STRING is down at the bottom. It's a label - a useful bit of compiler sugar that lets us humans mark parts of the assembly with a name that we can use later. The first thing that comes after STRING is defb "Hello World!". The command defb is short for define bytes. It's a way of defining a bunch of bytes at a location in memory. In this case, the bytes for the string we want to print.
Lets move in the section marked LOOP. The plan is to loop over all the characters in the string "Hello World!", printing each one, stopping when there are no more. The first line in the loop ld a, (bc) loads the value of whatever bc points to, into the accumulator register a. Remember, bc is pointing to the first byte of "Hello World!", so H is now in the accumulator.
The next few lines are the condition for stopping printing. We compare whatever is in register a with the number 0. If it's 0, we jump out of the loop and stop. If not, we simply carry on with the next instruction. So cp 0 does the comparison of a with 0. The next line jr z, EXIT will jump the program to EXIT if the previous comparison was true. If we take a look at the very last line of the program we see defb 13, 0. The very last defined byte in this program is 0 and it comes just after the string "Hello World!" we defined. So eventually, if we carry on, we'll hit this 0 and stop.
But for now, it's the letter "H" in our a register so we don't jump. Instead, we see rst $10. Now this is where the magic begins. $10 is a shorthand for writing the Hex value 10, not the decimal 10. rst calls whatever subroutine comes after it. In this case, we push all our variables onto the stack, jump to location 0x10 and run what we find. Notice that 0x10 is right in the ROM section of the memory map. It turns out, this subroutine will print whatever is in register a to the screen. Perfect!
The remaining lines increment our registers, bc. bc now points to the next character in the string, "e". Finally, we jump back to the top of the LOOP with jr LOOP. So there you have it! "Hello World!" in a tight set of assembly instructions.
This is just a quick little introduction to getting the basic tool-chain up for programming the ZX Spectrum. In the next part of this series, we'll look at how to draw some basic graphics, with that classic Spectrum "Colour Clash" aesthetic.
When I started out looking for resources on how to program the specky, there seemed to be quite a few, but no single, definitive resource. Some I found had code that just didn't seem to work. Others spent ages talking about counting in Hex before getting to the point. Nevertheless, I've included a list of resources I found super handy when learning.
